REAR MAP LIGHT REMOVAL/INSTALLATION
id091800703100
1. Disconnect the negative lead-acid battery terminal. (See NEGATIVE LEAD-ACID BATTERY TERMINAL DISCONNECTION/CONNECTION.)
2. Remove the following parts.
- (1) Front map light(See FRONT MAP LIGHT REMOVAL/INSTALLATION [(E)].)
-
- (2) Sensor cover (See SENSOR COVER REMOVAL/INSTALLATION.)
-
- (3) Sunvisor (See SUNVISOR REMOVAL/INSTALLATION.)
-
- (4) Assist handle (See ASSIST HANDLE REMOVAL/INSTALLATION.)
-
- (5) Front pillar trim (See FRONT PILLAR TRIM REMOVAL/INSTALLATION.)
-
- (6) Roof side trim (See ROOF SIDE TRIM REMOVAL/INSTALLATION.)
-
- (7) Rear package tray (See REAR PACKAGE TRAY REMOVAL/INSTALLATION.)
-
- (8) Trunk side upper trim (See TRUNK SIDE UPPER TRIM REMOVAL/INSTALLATION.)
-
- (9) Rear pillar trim (See REAR PILLAR TRIM REMOVAL/INSTALLATION.)
-
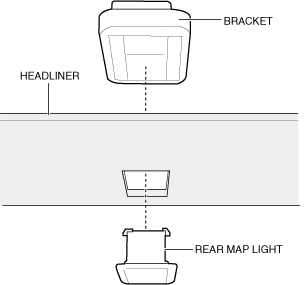
- (10) Headliner (See HEADLINER REMOVAL/INSTALLATION.)
-
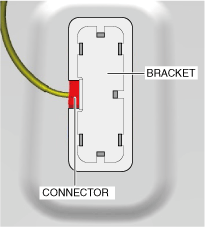
3. Disconnect the connector.
-
Caution
-
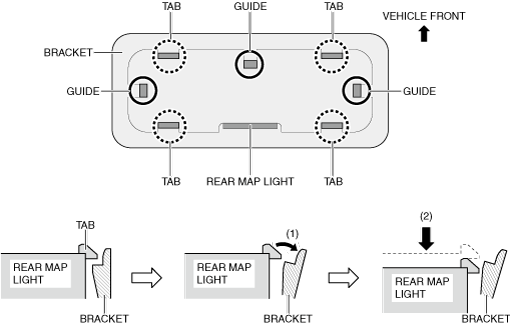
• When removing the rear map light from the bracket, the rear map light may fall off and be damaged. When removing the rear map light from the bracket, support the rear map light as you work.
4. Move the bracket in the direction of arrow (1) shown in the figure, press the rear map light in the direction of arrow (2) shown in the figure, and then detach the rear map light tabs from the bracket.
5. Remove the rear map light.
6. Install in the reverse order of removal.