 |
am6zzw00015813
ROOF MOLDING REMOVAL
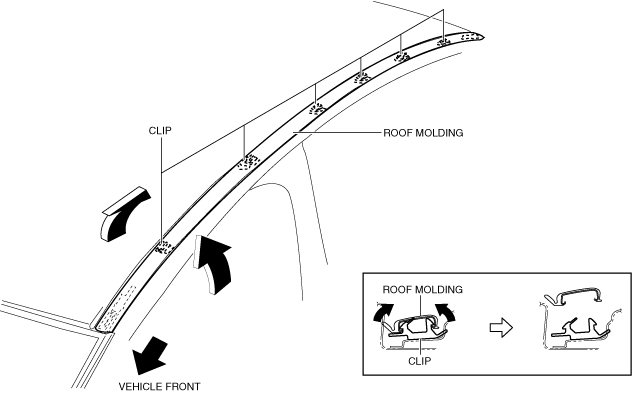
id091600447800
4SD
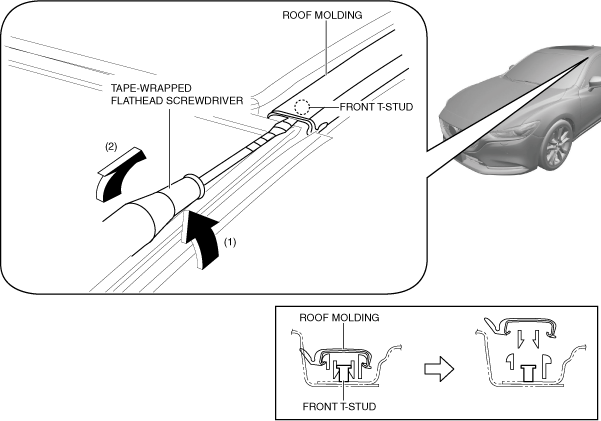
1. Insert a tape-wrapped flathead screwdriver in the position shown in the figure.
am6zzw00015813
|
2. Rotate a tape-wrapped flathead screwdriver in the direction of the arrows in the order of (1), (2) shown in the figure and remove the roof molding from the front T-stud.
3. Rotate the roof molding in the direction of the arrows shown in the figure and remove it starting from the clips at the front of the vehicle.
am6zzw00015814
|
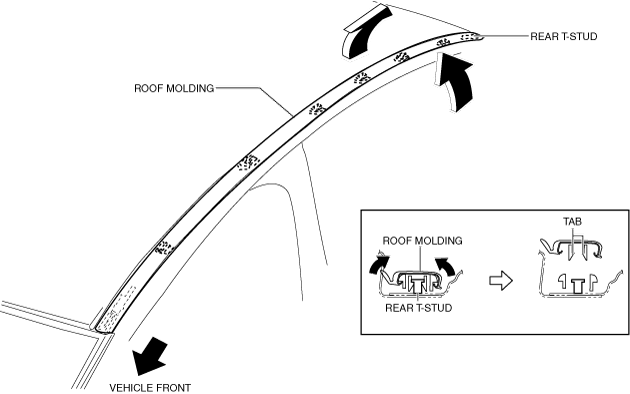
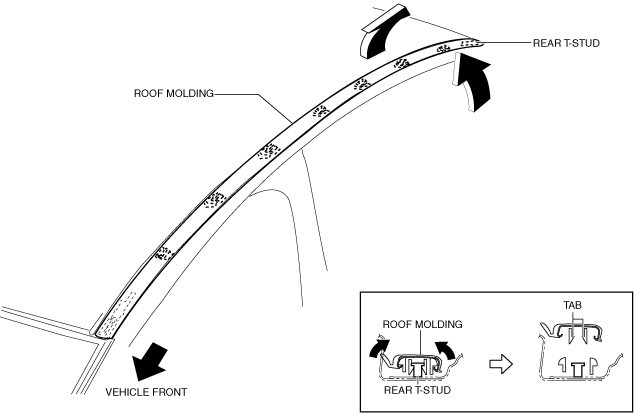
4. Rotate the roof molding in the direction of the arrows shown in the figure and remove the roof molding tab from the rear T-stud.
am6zzw00015815
|
WGN
With Roof Rail
1. Disconnect the negative battery terminal. (See NEGATIVE BATTERY TERMINAL DISCONNECTION/CONNECTION.)
2. Remove the following parts:
3. Insert a tape-wrapped flathead screwdriver in the position shown in the figure.
am6zzw00015813
|
4. Rotate a tape-wrapped flathead screwdriver in the direction of the arrows in the order of (1), (2) shown in the figure and remove the roof molding from the front T-stud.
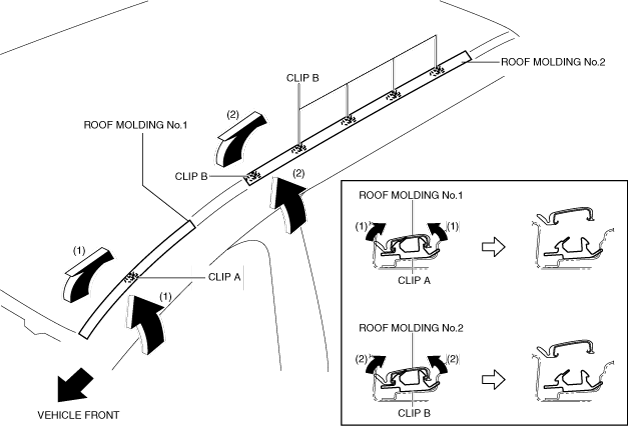
5. Rotate the roof molding No.1 in the direction of arrows (1) shown in the figure and remove the roof molding tab from clip A.
am6zzw00015816
|
6. Rotate the roof molding No.2 in the direction of arrows (2) shown in the figure and remove the roof molding tab from clips B.
Without Roof Rail
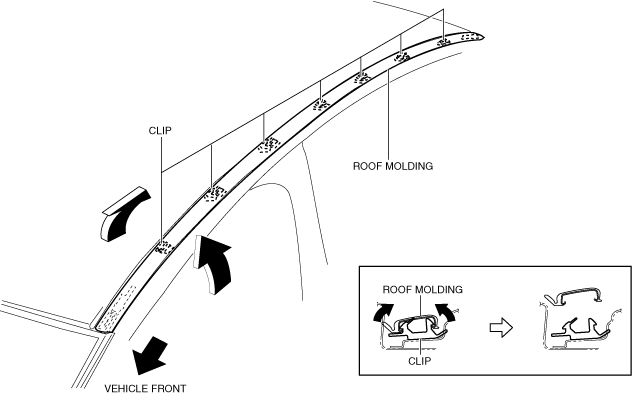
1. Insert a tape-wrapped flathead screwdriver in the position shown in the figure.
am6zzw00015813
|
2. Rotate a tape-wrapped flathead screwdriver in the direction of the arrows in the order of (1), (2) shown in the figure and remove the roof molding from the front T-stud.
3. Rotate the roof molding in the direction of the arrows shown in the figure and remove it starting from the clips at the front of the vehicle.
am6zzw00015817
|
4. Rotate the roof molding in the direction of the arrows shown in the figure and remove the roof molding tab from the rear T-stud.
am6zzw00015818
|